The Tale of the Tangled Pot: Recognizing our Deeply Rooted and Inseparable Connection with the Natural World Through the Practice of Nature Journaling
June 14, 2026
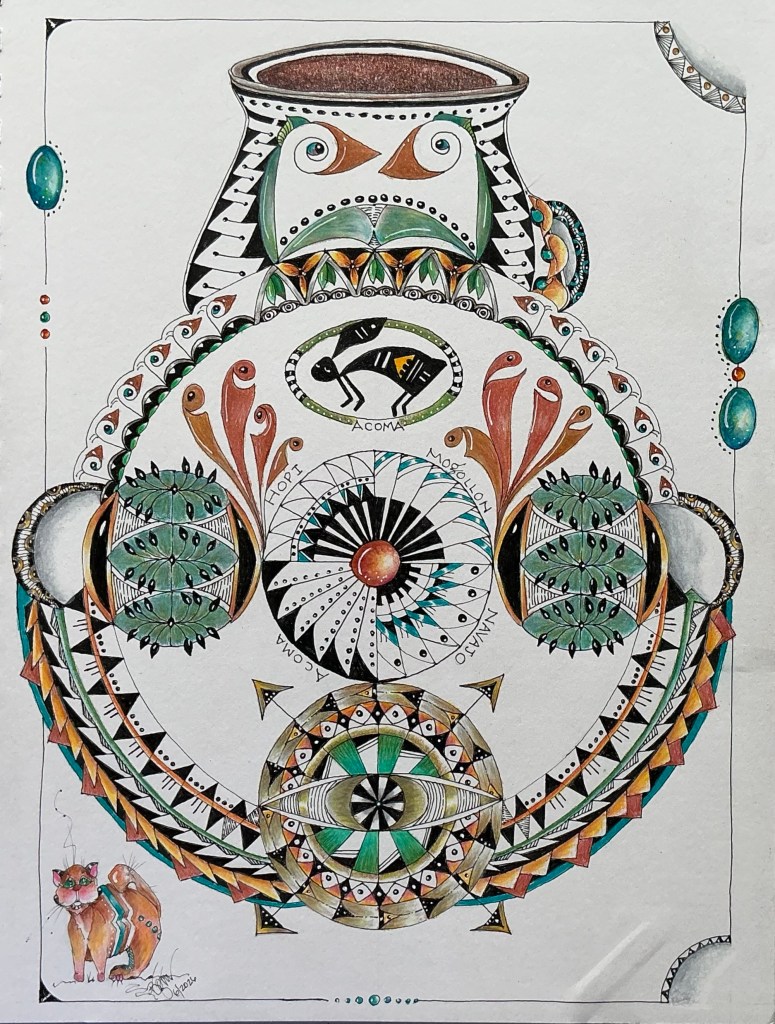
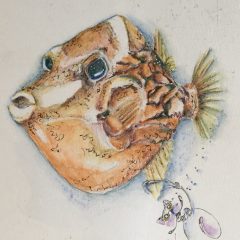
Living in the desert Southwest, inspiration for many of my Zentangle work comes from the representative art created by the indigenous peoples of New Mexico and the Four Corners region. Their deep connection with nature was often expressed in ancient rock art and on handcrafted pottery in ways that amaze. It takes me back to a different time and place; where their way of life was deeply rooted and inseparable from the natural world; where survival required an understanding and appreciation of the countless interdependent components required for the productive function and evolution of complex ecosystems.
Fast forward to today. Our fast-paced, stress-filled, consumer-centric lifestyles, full of techno-gadgets (demanding so much of our attention), and instant gratification, offers people a cushy arm-chair view of the world. Why put down those phones or turn off the TV, when we can safely and comfortably “witness” nature from our homes? Better yet, why not?
While pondering that question, many compelling reasons came so easily. Just being present in nature can be calming; relaxing; stress-reducing — we slow down, taking time to observe our natural surroundings. By really “seeing” local ecosystem(s) with all of our senses, we experience awe and wonder and make meaningful memories. Our once dormant skills in curiosity and critical thinking come alive as we learn about the integral connectedness of nature’s many and diverse components. By understanding and valuing how our connectedness to nature always has been and always will be critical not only to our very survival, but to the survival of all species, we realize the ability of all living things to thrive benefits from natural ecosystem services that provide things like clean water to drink, clean air to breathe, food to eat, and a habitable climate. These vital services are priceless. All nature asks is that we keep it healthy. First-hand personal exposure to the natural world fosters appreciation, love, and a desire to nurture and protect nature; an investment in the future of all life on Earth.
Observing the Natural World through the Practice of Nature Journaling
People have been observing, learning, and recording nature around the world for millennia. The oldest known cave art (pictographs) with paintings of wildlife, primitive humans, and human-bird hybrids hunting pigs, was discovered on an Indonesian island, and dates back almost 70,000 years. The oldest known rock carvings (petroglyphs), created by the Aborigines of Western Australia 40,000 – 50,000 years ago, depict wildlife and hunting parties. The oldest known petroglyphs found in North America were carved into boulders by still-unidentified humans that lived in the Winnemucca, NV area (east of Reno) between 10,000 and 14,800 years ago; their rock art represents leaves and trees. The oldest pictographs and petroglyphs found in New Mexico were made by Ancestral Puebloans and other Indigenous groups between 3,000 to 4,000 years ago in the Guadalupe Mountains/Carlsbad Region (southern NM) and depict hunting parties, wildlife and other natural elements.
The travelers, explorers and settlers that arrived in North America significantly influenced nature recording. They kept journals, field notes, and artistic renderings tracing a rich history of scientific inquiry and ecological changes spanning early colonial times to the formal natural history expeditions of the American West. For example, John Lawson (1709) and Mark Catesby (1731-1743), each published a book with their observations of the flora and fauna of the eastern colonial colonies (Catesby) and the southeast (Lawson). Extensive and diverse nature observations were recorded by all members of the Lewis and Clark Expedition (1804-1806), and by John James Audubon (1827-1838) with a focus on birds in their natural habitats. These and many more examples of “journaling nature” provided an understanding of the complex ecosystems that existed between two oceans, and was indispensable to the successful settling of North America.
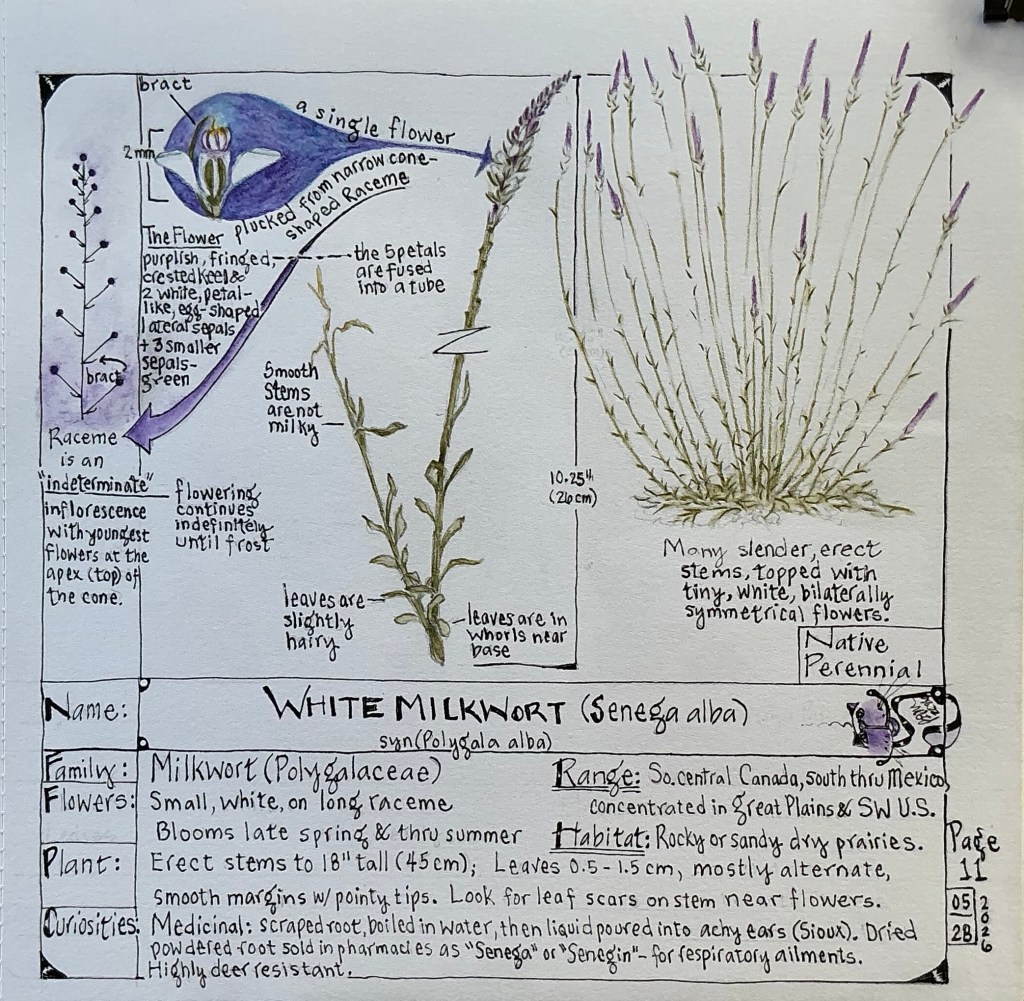
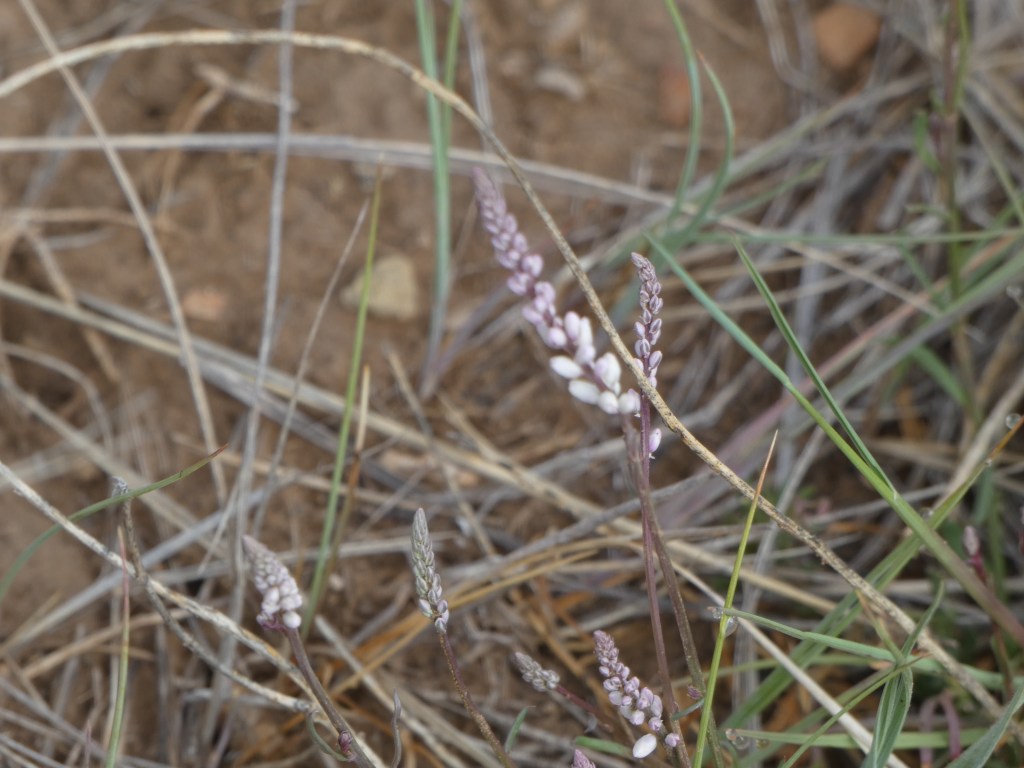
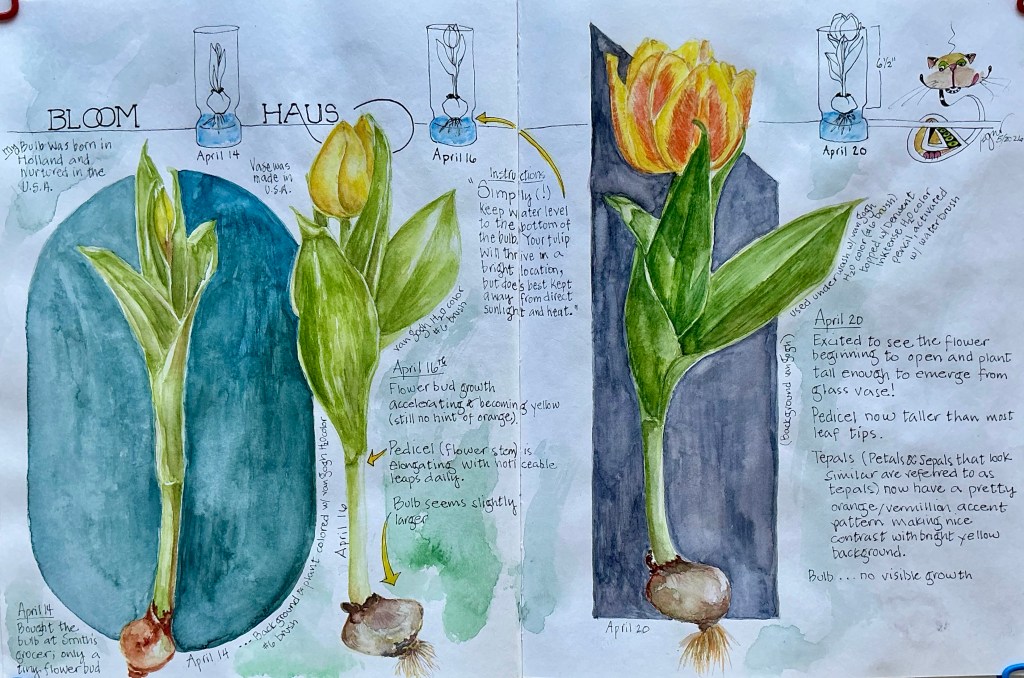
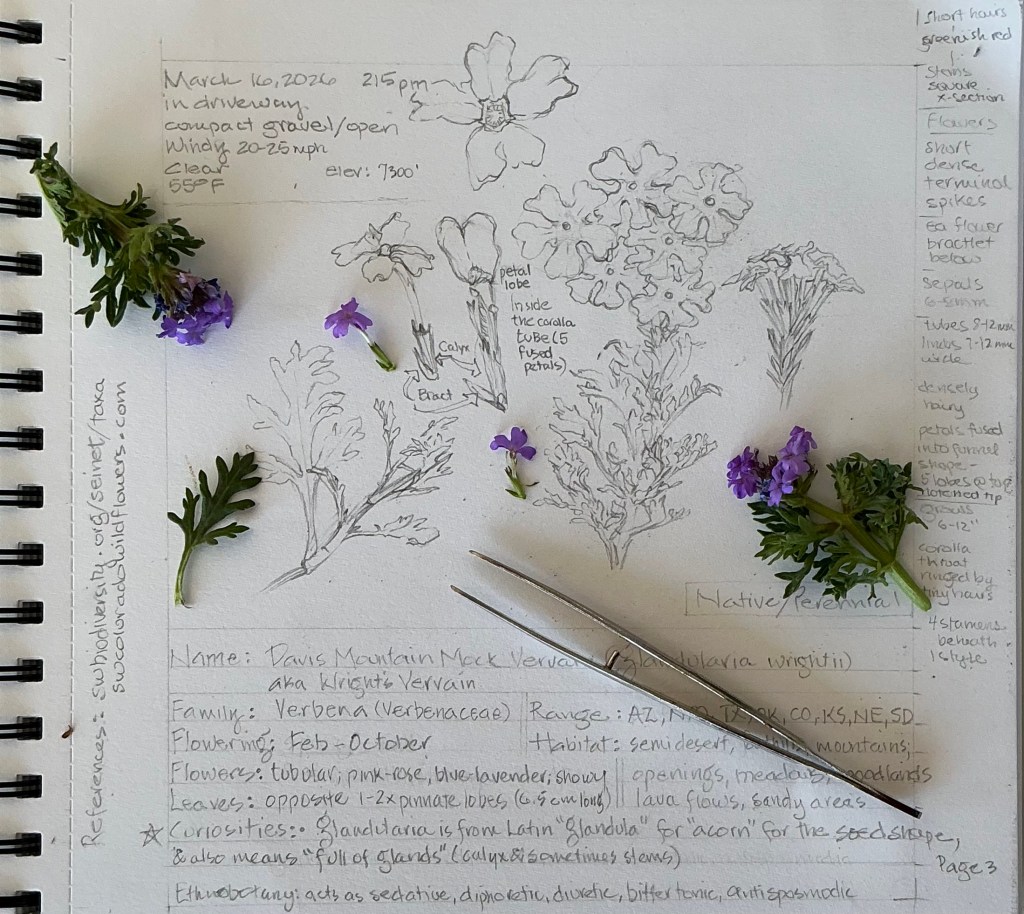
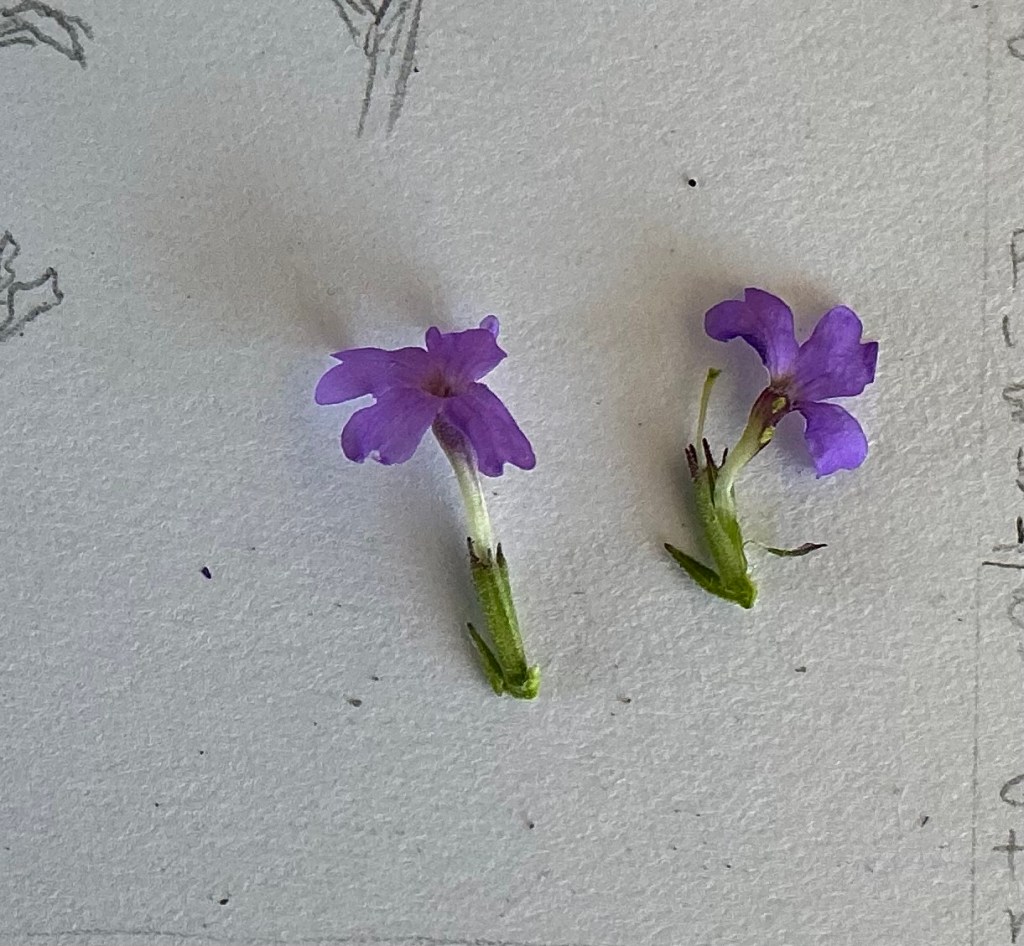
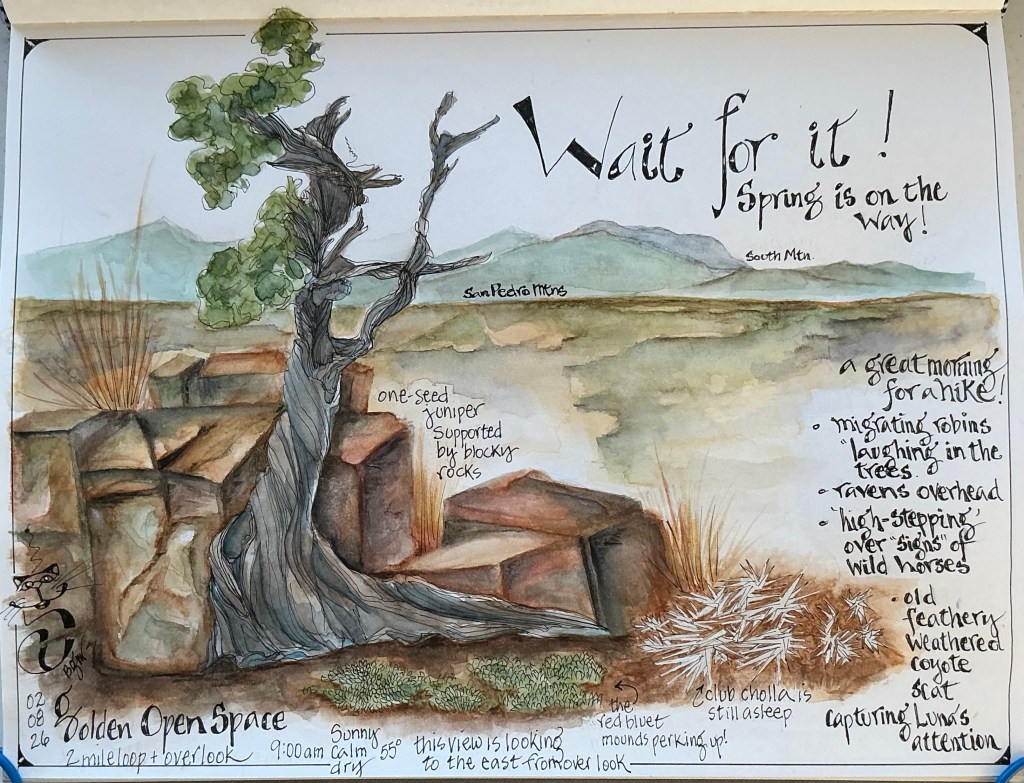
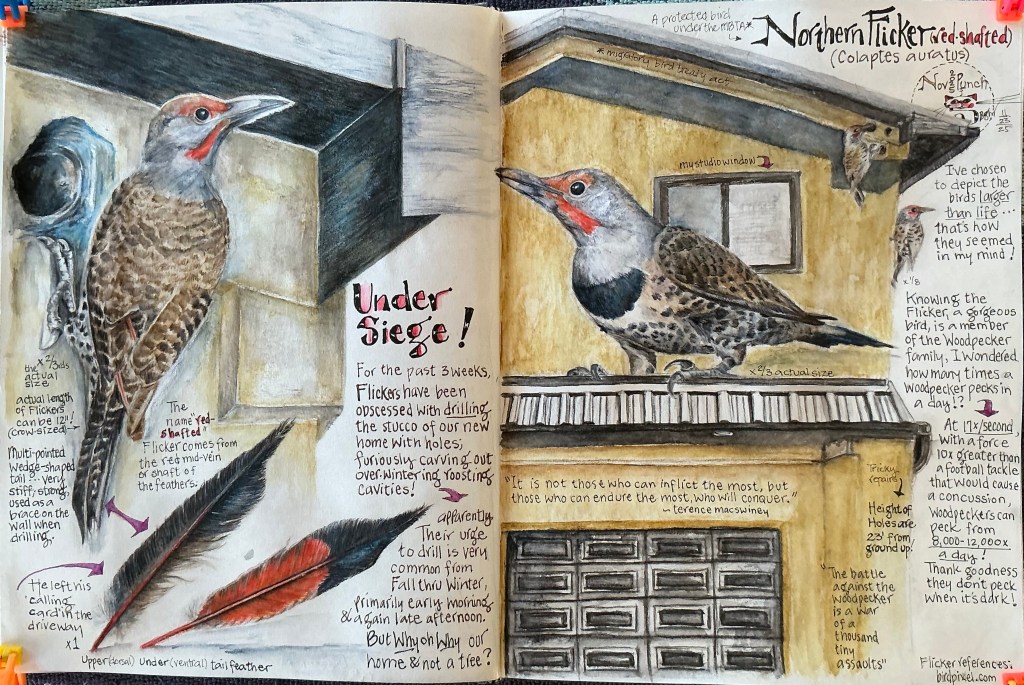
Today’s Practice of Nature Journaling — paying attention, recording observations, asking questions, noticing changes, and reflecting on the natural world — is nearly identical to historical journaling practices, with some healthy advantages for mind and body. For example, Nature Journaling offers much needed mental, cognitive, and emotional relief, particularly important in today’s world. It also provides a screen-free way to reduce stress, encourage mindfulness, and sharpen observational and critical thinking skills. By intentionally immersing ourselves in nature — by being fully present — we can experience these benefits, and more. We find our place in nature by making connections and understanding how we are an integral and inseparable part of the environment around us.
“Walking” thoughtfully and gently in nature inspires us to nurture and protect what we are all part of, instilling in us a deep appreciation for the natural resources essential for the survival of our ancestors, as well as for our survival today and for future generations.
……………………………………………………………………………………………………
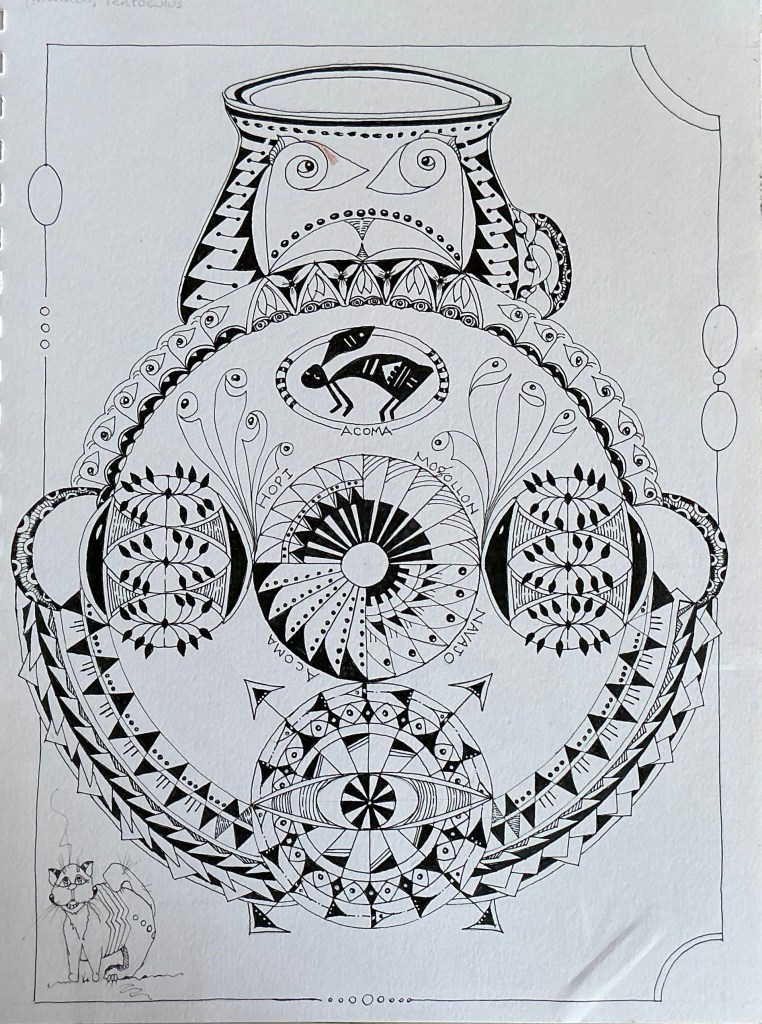
Many thanks to Angie Gittles, a Certified Zentangle Teacher, for developing the step-outs to an abundance of patterns inspired by Indigenous Peoples of the Southwest. Her inspiration inspired me to weave 10 of her different designs into a stylized pot to honor and encourage such an important way of life. In doing so, I took my time, taking many deep breaths during the process, and thought about the days when appreciating and expressing nature was a natural way of living.
……………………………………………………………………………………………………
Resources and a Few Important Tips
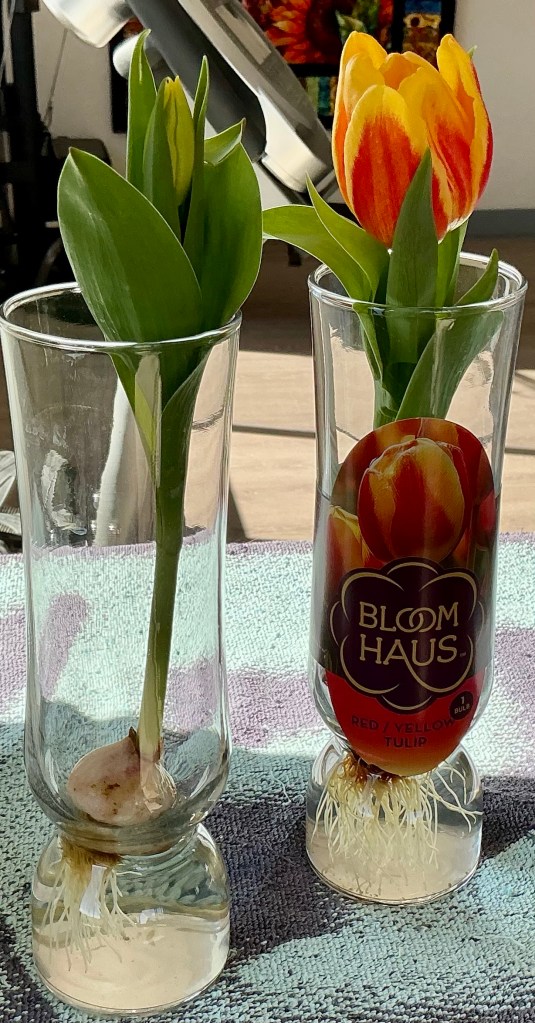
Whether you consider yourself a “Nature Journaler” and would like to learn more, or are interested in how to begin, there are countless resources and examples to refresh your skills or to get you started. Borrow a library book, such as Nature Drawing by Claire Walker Leslie, Keeping a Nature Journal by Leslie Roth, or Nature Drawing and Journaling by John Muir Laws.
To get started in journal sketching or to improve your skills, check out the following: Discovering the Art of Field Sketching by Kristin Link, Botanical Drawing using Graphite and Colored Pencil by Sue Vize, or The Artist’s Guide to Sketching by James Gurney and Thomas Kinkade.
Of course there hundreds of thousands of on-line resources and social media sites about Nature Journaling and related topics. But beware the pit trap ….. lest you get caught up in doom of perpetual scrolling, never to get a breath of fresh air in the light of day!
If you’re unsure about becoming a “Nature Journaler,” know that anyone can head to the woods, the backyard, or sit by a window. You don’t have to travel hundreds of miles to visit a National Park ….. nature is everywhere! All you need is a pencil and piece of paper, the curiosity to see what’s around you, and the desire to slow down and observe with all your senses. There’s no right or wrong way to journal in nature, but when you do, be fully present; take the time to really “see” your surroundings. Just committing to turning off your screens to nature journal for 5 minutes a day will be perfect for you!
……………………………………………………………………………………………………
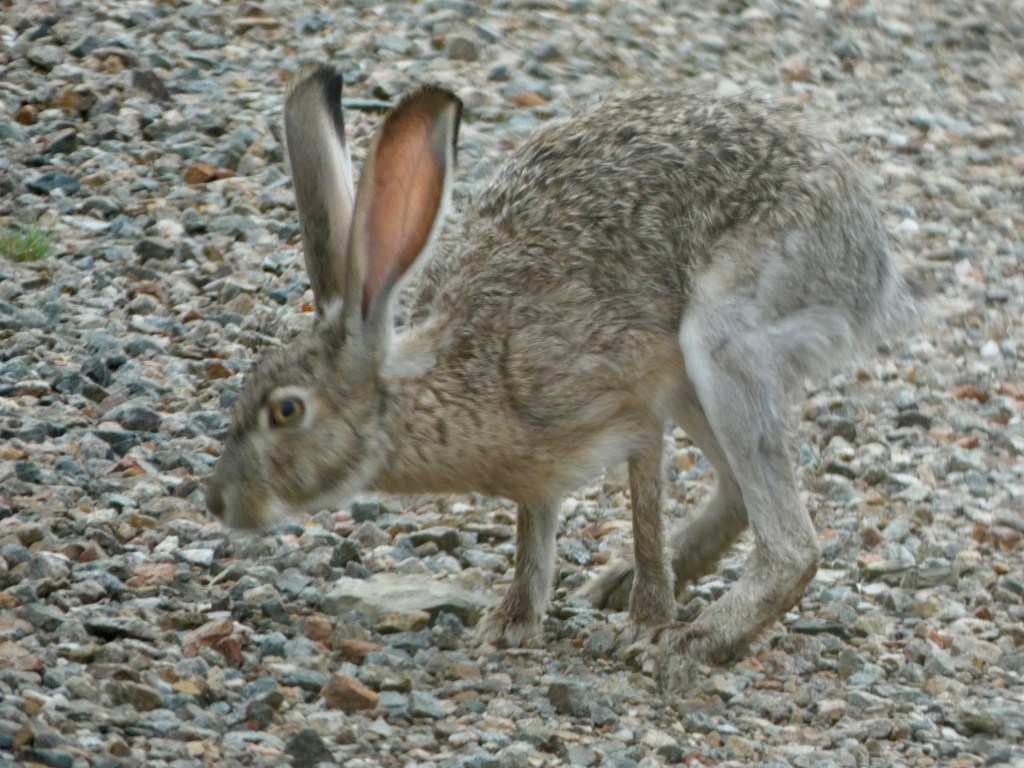
Hope you enjoyed my Tangled Pot. As I always do while nature journaling, when creating these kinds of Zentangle-inspired works, my automatic slow-down mode becomes engaged, allowing me to think about possible directions I can take to complete a page. Sometimes the path is direct, but more often a world of rabbit trails leading to deep holes opens up before me, and I gotta take the plunge. That’s exactly what happened while tangling the Pot. And that’s what got me thinking about— how our ancestors used to live in nature, how art represents nature— how nature is endlessly tangled up in life— how today’s values take a back seat to our crucial connections with nature—how nature journaling can be used as a tool to restore gratitude and appreciation for nature—how, without nature, life as we know it would not exist.
I’m going to turn off my computer now and go enjoy a walk in nature with my journal. Are you inspired to do the same?